
Why Cherry Pie Bars Are the Perfect Dessert
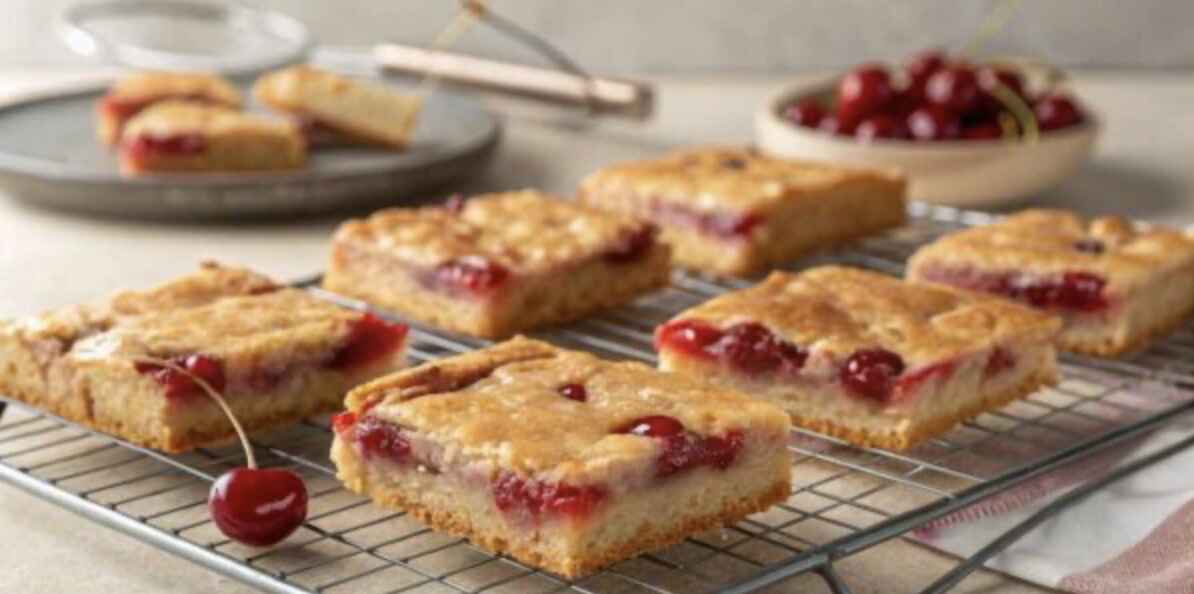
One lazy Sunday, a sweet craving hit—but I wasn’t about to wrestle with pie dough. Spotting cherries in the pantry and butter in the fridge, I threw together a simple crust, spread on the tangy filling, and topped it with golden crumbles. The smell was irresistible, and that first bite? Buttery, crunchy, and gooey all at once. Just like that, cherry pie bars became my go-to dessert—easy like a cookie, satisfying like a pie. 🍒
Table of contents
“Cherry pie bars are like a love letter to classic cherry pie—just in a handheld, no-fuss form!”
Unlike a full-sized pie that requires slicing, serving, and sometimes even a fork, these bars are grab-and-go friendly. Plus, they’re **way easier to make** than rolling out a pie crust. Sounds like a win-win, right?
Ingredients for the Best Cherry Pie Bars
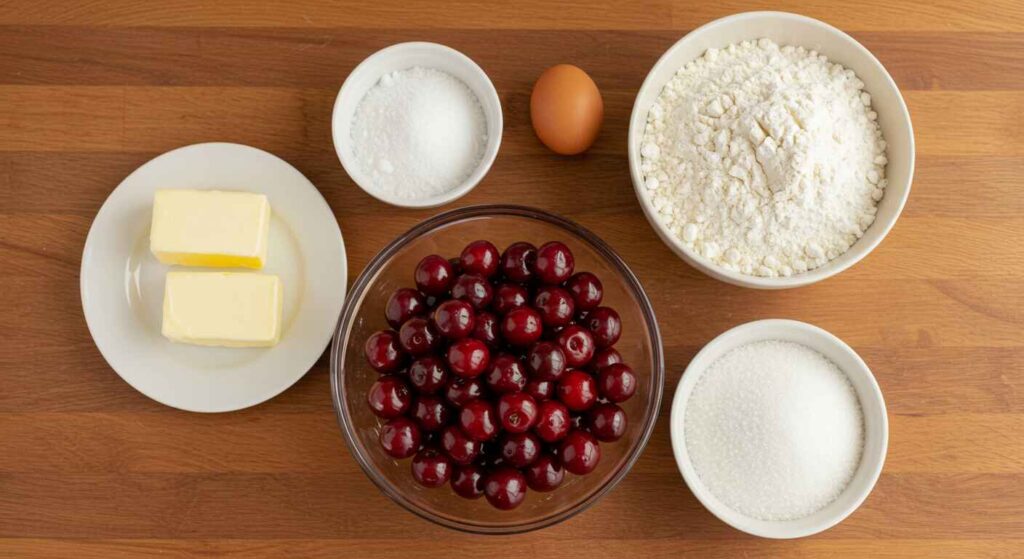
Before we dive into the magic of baking, let’s talk ingredients. The best cherry pie bars have a soft, buttery crust, a thick and fruity filling, and just the right amount of sweetness. Here’s everything you’ll need:
| Ingredient | Quantity | Purpose |
|---|---|---|
| All-purpose flour | 2 ½ cups | Gives structure to the crust |
| Unsalted butter | 1 cup (softened) | Adds richness and flakiness |
| Granulated sugar | 1 ½ cups | Sweetens the crust and filling |
| Eggs | 4 large | Helps bind everything together |
| Vanilla extract | 1 tsp | Enhances the flavor |
| Cherry pie filling | 2 cans (21 oz each) | The heart of the dessert! |
| Baking powder | 1 tsp | Gives the crust a slight lift |
| Salt | ½ tsp | Balances the sweetness |
Step-by-Step Instructions for Making Cherry Pie Bars
1. Preparing the Crust and Base Layer
The crust is the foundation of any good cherry pie bar. Think of it as the delicious buttery hug that holds everything together.
- Preheat your oven to 350°F (175°C). Grease a 9×13-inch baking pan or line it with parchment paper.
- In a large mixing bowl, beat together the butter and sugar until fluffy. This takes about **2–3 minutes**—don’t rush it!
- Add the eggs, one at a time, mixing well after each addition. Stir in the vanilla extract.
- In a separate bowl, whisk together the flour, baking powder, and salt. Slowly add this to the wet mixture, stirring until combined.
- Spread **⅔ of the dough** evenly into the prepared baking pan. It’ll be sticky, so use a spatula or damp fingers to press it down.
2. Making the Perfect Cherry Filling
Cherry pie bars wouldn’t be the same without that gooey, fruity center! While store-bought cherry pie filling works great, you can also make your own:
- Combine **4 cups of pitted cherries** (fresh or frozen) with **¾ cup sugar** and **1 tbsp cornstarch** in a saucepan.
- Cook over medium heat, stirring frequently, until thickened—about **5–7 minutes**.
- Let it cool slightly before spreading it over the crust.
3. Assembling and Baking to Perfection
Now, for the fun part—layering everything together!
- Spread the cherry filling evenly over the crust.
- Drop spoonfuls of the remaining dough on top—don’t worry about covering it completely. You want a rustic, crumbled effect.
- Bake for **35–40 minutes**, or until the top is golden brown and set.
4. Cooling and Cutting for the Best Results
Resist the urge to dig in right away! Let the bars cool for **at least 30 minutes** before cutting. This allows everything to set up properly, so you get **clean, beautiful slices.**
“Patience is key! Cutting too soon can turn your bars into a sticky, gooey mess.”
Common Problems and How to Fix Them
Even the best bakers run into issues sometimes. Here’s how to fix the most common problems with cherry pie bars:
Why Did My Crust Turn Out Too Hard?
Overmixing the dough or using too much flour can make the crust tough. Next time, mix just until combined and spoon the flour into your measuring cup instead of scooping.
Fixing a Soggy or Undercooked Bottom Layer
If your bottom crust is soggy, your oven may not be hot enough. Make sure it’s fully preheated and bake on the center rack.
How to Achieve the Perfect Golden Brown Top
If the top isn’t browning evenly, your oven temperature might be uneven. Try rotating the pan halfway through baking for a consistent golden finish.
Variations and Creative Twists on Cherry Pie Bars
Alright, so you’ve mastered the classic cherry pie bars. But what if you’re in the mood to mix things up? No worries—I’ve got some exciting variations that will take these bars to the next level. Whether you love a little crunch, chocolate, or need a gluten-free option, there’s something here for you! 🍒
Cherry Almond Crumble Bars
Almonds and cherries? A match made in dessert heaven! The nuttiness of almonds adds a fantastic crunch to balance the sweet and tart flavors. Here’s how to do it:
- Swap **½ cup of the flour** for **½ cup of almond flour** in the crust.
- Add **1 tsp almond extract** to the dough for a subtle nutty aroma.
- Sprinkle **sliced almonds** over the top before baking for an extra crunch.
“Almonds give cherry pie bars a gourmet twist with a nutty crunch and deeper flavor.”
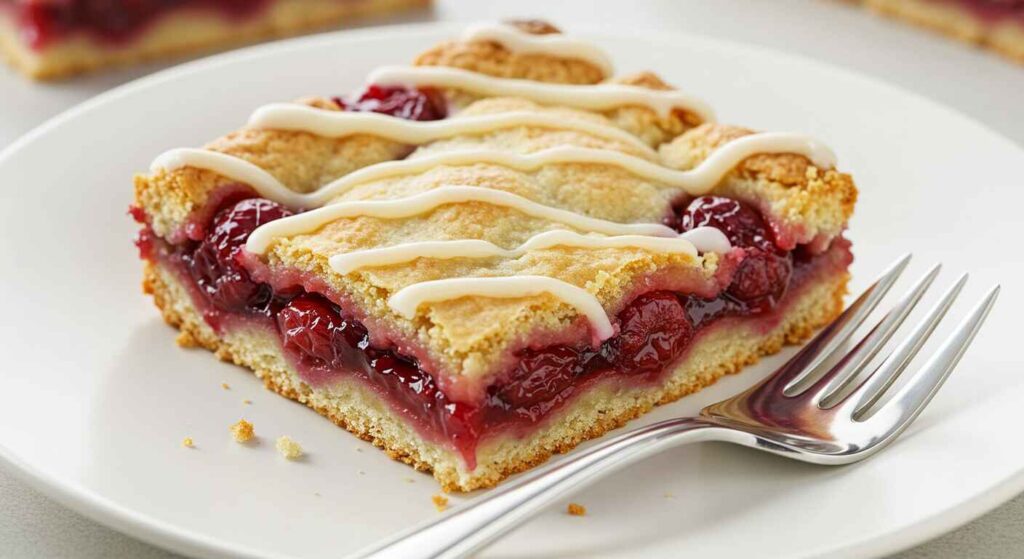
Chocolate-Drizzled Cherry Pie Bars
Love the combo of cherries and chocolate? This one’s for you! After your bars have cooled, take them up a notch:
- Melt **½ cup of dark or white chocolate chips**.
- Drizzle the melted chocolate over the bars using a spoon or piping bag.
- Let the chocolate harden before slicing—if you can wait that long!
Gluten-Free and Vegan Options
Don’t worry, my gluten-free and vegan friends—I’ve got you covered! Here’s how to tweak the recipe:
| Ingredient | Gluten-Free Substitution | Vegan Substitution |
|---|---|---|
| All-Purpose Flour | 1:1 Gluten-Free Flour Blend | Almond or Oat Flour |
| Butter | Use as is | Vegan Butter or Coconut Oil |
| Eggs | Use as is | Flax Egg (1 tbsp ground flax + 3 tbsp water per egg) |
| Cherry Pie Filling | Use as is | Ensure no added animal-based thickeners |
These swaps keep the flavor and texture intact while making your bars **diet-friendly** for more people!
Storing and Serving Cherry Pie Bars
Now that you’ve got these delicious bars, let’s talk about how to **store them properly** so they stay fresh for as long as possible!
How to Keep Them Fresh for Longer
- Let the bars cool completely before storing.
- Keep them in an **airtight container** at room temperature for up to **3 days**.
- For longer storage, refrigerate them for **up to a week**.
Can You Freeze Cherry Pie Bars?
Absolutely! Freezing these bars is a great way to enjoy them later. Here’s how:
- Cut the bars into squares and place them in a **single layer** on a baking sheet.
- Freeze for **about an hour**, then transfer them to a freezer-safe bag or container.
- When ready to eat, let them thaw at room temperature or warm them up in the microwave for **10–15 seconds**.
Best Ways to Serve for Maximum Enjoyment
These bars are already delicious on their own, but here are some ways to **level up** the experience:
- With Ice Cream: Warm up a bar and serve it with a scoop of **vanilla or almond ice cream**. 🍨
- With Whipped Cream: A dollop of **homemade whipped cream** makes them extra decadent.
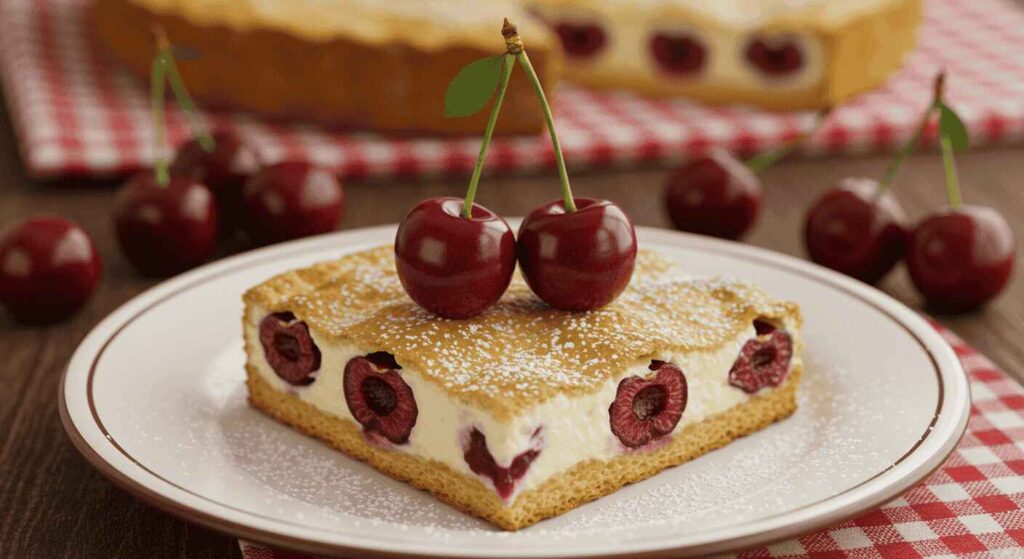
- With a Dusting of Powdered Sugar: This gives them a bakery-style look and a little extra sweetness.
- Paired with Coffee or Tea: The buttery crust and fruity filling are perfect with a hot drink. ☕
Cherry Pie Bar Troubleshooting: Common Issues & Easy Fixes
Not every batch turns out picture-perfect. But don’t worry—if your cherry pie bars aren’t quite right, you’re not alone! Let’s tackle some of the most common baking mishaps and how to fix them. 🍒
1. Bars Turned Out Too Soft or Mushy
Instead of a firm, sliceable treat, do you have a gooey mess? Here’s how to avoid it:
- Check baking time: If they’re underbaked, pop them back in for another **5-10 minutes**.
- Control the filling: Too much cherry filling can overwhelm the crust, making it soggy. Stick to around **1 ½ cups**.
- Let them cool: Bars firm up as they sit, so don’t cut them while warm!
2. Crust Feels Tough or Dry
A good crust should be **buttery and tender**—not hard as a rock. If yours is too firm, try these tips:
- Use cold butter: Soft or melted butter creates a dense crust. Keep it chilled for that flaky texture.
- Don’t overmix: Overworking the dough leads to toughness. Mix just until combined.
- Add moisture: If the dough feels dry, **a splash of milk or an extra egg yolk** can make a difference.
3. Bars Fall Apart When Cutting
Do your bars crumble into pieces instead of cutting cleanly? Here’s how to keep them intact:
- Cool completely: Let them sit for at least **one hour** before slicing.
- Use a sharp knife: A dull blade will squish the bars rather than cut them neatly.
- Refrigerate before slicing: Chilling the bars for **15-20 minutes** makes them easier to cut.
4. Cherry Filling Overflowed
If your bars look like a cherry explosion, you might be using too much filling or not sealing the crust properly.
- Thicken the filling: If using fresh cherries, add **1 tablespoon of cornstarch** to prevent it from getting too runny.
- Press the crust up the sides: This creates a barrier that helps contain the filling.
- Avoid overfilling: Too much cherry goodness can backfire! Stick to about **1 ½ cups** for best results.
How to Store Cherry Pie Bars for Maximum Freshness
You’ve nailed the recipe—now let’s keep those bars **fresh and delicious** for as long as possible. Here’s how:
Short-Term Storage
- Room temperature: Store in an airtight container for up to **2 days**.
- Refrigerator: If you want them to last longer, refrigerate for up to **5 days**.
Freezing for Later
- Wrap individual bars tightly in plastic wrap, then place them in a freezer-safe bag.
- They stay fresh for **up to 3 months**.
- To thaw, let them sit at room temperature for about **30 minutes** or warm them in the microwave for a few seconds.
Creative Ways to Serve Cherry Pie Bars
Why stop at eating them plain? Here are some fun ways to level up your cherry pie bar experience:
Pair Them with the Perfect Drink
- Coffee: A **rich espresso** or creamy cappuccino enhances the flavors.
- Tea: Try **chamomile or black tea** for a comforting combo.
- Milk: A cold glass of milk balances the sweetness.
- Red Wine: A **Pinot Noir** or Merlot complements the cherry filling beautifully. 🍷
Turn Them into a Whole New Dessert
- Cherry Pie Bar Sundae: Crumble over **vanilla ice cream** and drizzle with caramel. 🍨
- Breakfast Twist: Serve with **Greek yogurt and honey** for a morning treat.
- Layered Parfait: Alternate with **whipped cream and fresh fruit** for a light dessert.
Why You’ll Love These Cherry Pie Bars
Here’s why these bars deserve a permanent spot in your baking rotation:
- **Super simple to make**—way easier than traditional cherry pie!
- **Perfect for any occasion**—from holidays to casual get-togethers.
- **Endlessly customizable**—swap in different fruits, toppings, or flavors.
“Cherry pie bars pack all the flavor of a homemade cherry pie into a simple, handheld treat.”
So grab your ingredients, preheat that oven, and let’s bake up something **truly delicious!** 🍒✨
Frequently Asked Questions About Cherry Pie Bars
Can I Use Different Fruits Instead of Cherries?
Absolutely! This recipe works great with blueberries, raspberries, or even a mix of berries. If using apples or peaches, cook them slightly before adding them to the bars.
How Do I Make Them Less Sweet?
If you prefer a less sweet dessert, you can:
- Use **unsweetened cherries** instead of canned pie filling.
- Reduce the sugar in the crust by **¼ to ½ cup**.
- Add a squeeze of **lemon juice** to balance the sweetness.
What’s the Best Way to Make Them Extra Crispy?
If you love a crunchier texture, try these tips:
- Bake for an extra **5–7 minutes** until golden brown.
- Use **half brown sugar and half white sugar** in the crust for a crispier finish.
- Let them cool completely before slicing—warm bars are softer.
Cherry Pie Bars Recipe
- Total Time: 55 minutes
- Yield: 12–16 bars 1x
- Diet: Vegetarian
Description
These cherry pie bars taste like a classic cherry pie but in an easy-to-make, shareable bar form! With a buttery shortbread crust, sweet cherry filling, and a crumbly streusel topping, these bars are perfect for any occasion—holidays, potlucks, or just a cozy treat at home.
Ingredients
For the Crust & Topping:
- 1 cup (2 sticks) unsalted butter, softened
- 1 ½ cups granulated sugar
- 4 large eggs
- 1 teaspoon vanilla extract
- ½ teaspoon almond extract (optional)
- 3 cups all-purpose flour
- ½ teaspoon salt
For the Filling:
- 1 (21-ounce) can cherry pie filling
- ½ teaspoon cinnamon (optional, for extra warmth)
For the Glaze:
- 1 cup powdered sugar
- 2 tablespoons milk
- ½ teaspoon vanilla extract
Instructions
Preheat & Prepare
- Preheat your oven to 350°F (175°C). Grease a 9×13-inch baking dish or line it with parchment paper for easy removal.
Make the Dough
- In a large mixing bowl, cream together the butter and sugar until light and fluffy.
- Add the eggs one at a time, mixing well after each addition. Stir in the vanilla and almond extract.
- Gradually add the flour and salt, mixing until fully combined. The dough will be thick.
Assemble the Bars
- Spread about ⅔ of the dough into the prepared baking dish, pressing it evenly into the bottom.
- Pour the cherry pie filling over the crust, spreading it out evenly. If using cinnamon, sprinkle it over the cherries.
- Crumble the remaining ⅓ of the dough over the cherry layer, creating a streusel-like topping.
Bake
- Bake for 35–40 minutes, or until the top is lightly golden and a toothpick inserted comes out clean.
- Allow the bars to cool completely before adding the glaze.
Prepare the Glaze
- In a small bowl, whisk together powdered sugar, milk, and vanilla until smooth.
- Drizzle the glaze over the cooled bars.
Cut & Serve
- Slice into squares or bars and enjoy!
Notes
- Fresh vs. Canned Cherries: If you want to use fresh or frozen cherries, cook them with sugar and cornstarch to thicken before adding to the bars.
- Add Nuts: Chopped almonds or pecans can be sprinkled on top for added crunch.
- Storage: Store bars in an airtight container at room temperature for up to 3 days or refrigerate for up to a week.
- Prep Time: 15 minutes
- Cook Time: 40 minutes
- Category: Dessert
- Method: Baking
- Cuisine: American
Nutrition
- Serving Size: 1 bar
- Calories: 250
- Sugar: 18g
- Sodium: 90mg
- Fat: 10g
- Saturated Fat: 6g
- Unsaturated Fat: 3g
- Trans Fat: 0g
- Carbohydrates: 36g
- Fiber: 1g
- Protein: 3g
- Cholesterol: 50mg